
Getting started with pipenv
A quick pipenv introduction. Getting you up and running, as fast as possible, with this flexible tool.
Getting started with pipenv
Now that you have a number of Python projects you are starting to realize, package conflicts are inevitable. You are left to wonder how to prevent this problem. You may have seen tutorials asking for you to “pipenv install pipfile” leaving you frustrated as you are not familiar with this way of working, regardless of the reason, perhaps it is time to start using “pipenv”
- Environment: Windows 10
- Editor: Visual Studio Code
These instructions are compatible with other Operating Systems and IDEs
Table of contents
If you are not interested in the history of package management and would like to just install pipenv, then skip to Introducing pipenv
pipenv benefits
pipenv was developed by Kenneth Reitz (@kennethreitz) as a temporary solution until the new pip specs are integrated
- Recommended by Python.org
- Easy to mage work environments
- Easy to share work environments
- Version integrity and control
Python Packaging History
It isn’t required to understand the history of package management in order to use pipenv. I am only giving a little background into what’s behind the effort, eventually pipenv should be integrated into pip (or become pip)
Historically the way Python managed packages was not ideal. After installing python, the user would have to download a zip file containing the package, unzip it, run “setup install”. Or open the archive, copying the zip contents into the side packages folder, an inconvenience.
At the time PyPi was just an index of packages with links to where users could download the zip files. Now a days, when a package is registered, it must be uploaded to the website.
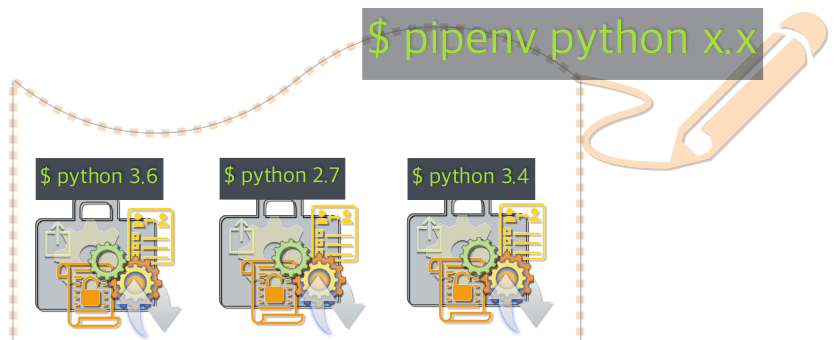
At the time all versions of Python were globally installed including the packages, this meant the user could not have two versions of a package. It also meant, if you developed an application using X version of a package, and needed to develop a new application using N version of that same package, it could potentially brake your code. As developers grew their environments, it would become more difficult to manage packages.
Then: came easy_install
The user would just type easy_install the name of the package, the script would go to PyPi and look for it on the index and get the URL from where to downloaded. it didn’t have an uninstall option and the integrity of the link depended on the publishers
Later: pip, virtualenv and requirements.txt
virtualenv a virtual environment tool became popular to manage different development environments to host different instances of Python and required packages, now you could have multiple versions of packages running with out conflicting with one another, thus protecting the integrity of other projects
requirements.txt became the file listing all the required resources for each virtualenv
pip is an improvement over easy_install, as it has more command options for managing Python packages, Resolves, Downloads, Installs and Uninstalls Python packages. It uses the requirements.txt and it can manipulate virtual environments, so pip became the standard
Python had no lock-file, as found in other development communities, such as PHP, Ruby and Rust. Although package management had grown, it continue to have its shared of headaches due to a lack of lock-files. Although the requirements.txt filled much of the lock-file role, the other two tools, pip and virtualenv, did not have a seamless integration. Later, pip-tools was developed to integrate these tools, but again, they where all developed individually and each had their shortcomings, trying to update one could brake the others.
The new: pipfile standard
- Pipfile replaces requirements.txt
- Uses the TOML file format
- It includes two groups [[packages]] and [[dev-packages]]
- Pipfile will eventually be integrated into pip
Sample of a Pipfile
[[source]]
name = "pypi"
url = "https://pypi.org/simple"
verify_ssl = true

[dev-packages]

[packages]
spacy = "*"

[requires]
python_version = "3.6"
When the Pipfile is processed, it generates Pipfile.lock, it adds the following:
- Two groups, “default” and “develop”
- It contains all the dependencies, including version numbers and hashes for each entry.
- The file will be formated in JSON for easy machine parsing
Sample file block of Pipfile.lock
{
    "_meta": {
        "hash": {
            "sha256": "19470a7a59afe1a70019f1dcb8c49c85ef5b22dcd5b8e35dc1669444376d88dd"
        },
        "pipfile-spec": 6,
        "requires": {
            "python_version": "3.6"
        },
        "sources": [
            {
                "name": "pypi",
                "url": "https://pypi.org/simple",
                "verify_ssl": true
            }
        ]
Introducing pipenv
It integrates pipfile, pipfile.lock, pip and virtualenv in a seamless package automating the virtual environment. It also allows for hash authentication upon installation. It is the Official recommendation by python.org
Pipenv Screencast by Kenneth Reitz
Install pipenv
Use pip to install pipenv. before installing it, you should update your version of pip
pip install --upgrade pip- In Windows
> python -m pip install --upgrade pip
- Install pipenv:
> pip install pipenv
- Create a new project folder (Windows):
> md new_project
- Navigate to the new folder
> cd new_project
- Create a new pipenv in the new folder
> pipenv --python 3.6# or what ever version- This will create all the necessary files
- Launch a subshell in pipenv
> pipenv shell- This will run pipenv version of Python
- Install a new package in new_project
> pipenv install <package_name>- This will update the Pipfile and Pipfile.lock
I assume you are relatively new to Python, and if you are not familiar with pipenv, I recommend you to familiarize with this process, as you move forward it will become a requirement for developing new projects and sharing them.
This blog is a quick pipenv introduction, getting you up and running as fast as possible with this flexible tool. For a comprehensive list of commands and full documentation please visit:
- Official website: https://pipenv.readthedocs.io/en/latest/
- Github repo: https://github.com/pypa/pipenv
- Kenneth Reitz vimo: https://vimeo.com/kennethreitz
Thank you
Enrique Bruzual
pipenv –help
A copy of pipenv help file for your convenience
pipenv --help
Usage: pipenv [OPTIONS] COMMAND [ARGS]...
| Options: | Description: |
|---|---|
| –where | Output project home information. |
| –venv | Output virtualenv information. |
| –py | Output Python interpreter information. |
| –envs | Output Environment Variable options. |
| –rm | Remove the virtualenv. |
| –bare | Minimal output. |
| –completion | Output completion (to be eval’d). |
| –man | Display manpage. |
| –support | Output diagnostic information for use in GitHub issues. |
| –site-packages | Enable site-packages for the virtualenv. |
| –python TEXT | Specify which version of Python virtualenv should use. |
| –three / –two | Use Python 3⁄2 when creating virtualenv. |
| –clear | Clears caches (pipenv, pip, and pip-tools). |
| -v, –verbose | Verbose mode. |
| –pypi-mirror TEXT | Specify a PyPI mirror. |
| –version | Show the version and exit. |
| -h, –help | Show this message and exit. |
Usage Examples:

   Create a new project using Python 3.7, specifically:
   $ pipenv --python 3.7

   Remove project virtualenv (inferred from current directory):
   $ pipenv --rm

   Install all dependencies for a project (including dev):
   $ pipenv install --dev

   Create a lockfile containing pre-releases:
   $ pipenv lock --pre

   Show a graph of your installed dependencies:
   $ pipenv graph

   Check your installed dependencies for security vulnerabilities:
   $ pipenv check

   Install a local setup.py into your virtual environment/Pipfile:
   $ pipenv install -e .

   Use a lower-level pip command:
   $ pipenv run pip freeze
| Commands: | Description: |
|---|---|
| check | Checks for security vulnerabilities and against PEP 508 markers provided in Pipfile. |
| clean | Uninstalls all packages not specified in Pipfile.lock. |
| graph | Displays currently-installed dependency graph information. |
| install | Installs provided packages and adds them to Pipfile, or if no packages are given, installs all packages from Pipfile. |
| lock | Generates Pipfile.lock. |
| open | View a given module in your editor. |
| run | Spawns a command installed into the virtualenv. |
| shell | Spawns a shell within the virtualenv. |
| sync | Installs all packages specified in Pipfile.lock. |
| uninstall | Un-installs a provided package and removes it from Pipfile. |
| update | Runs lock, then sync. |

Share this post
Twitter
Facebook
Reddit
Email